A lot has changed since I first wrote about CHR in Microsoft Azure. The latest RouterOS is 6.37 and our routers are working better than ever.
To update my earlier observations:
- CHR VMs will now gracefully Start and Stop without the risk of them ending up in an inconsistent state.
- Recent RouterOS upgrades we’ve performed have completed without issue.
- You still need to convert the Mikrotik supplied VHDX to VHD before uploading.
- Redeploying/resizing a CHR will result in the software ID changing.
- We get much better performance by using Standard VM SKUs as opposed to Basic
As promised, here are the basic steps to get one up and running. I’m time poor so I’m assuming you already know your way around the ARM portal and can connect to your Azure account with the PowerShell module.
Firstly, to save you the time of converting the Mikrotik VHDX, here’s a VHD of 6.37.1 I prepared earlier.
You’ll need a resource group, NIC, and storage account if you don’t already have these. It’s also a good idea to attach a public IP address to the NIC, and set up a security group allowing winbox access, if you don’t have VPN access to your Azure environment, or a pre-existing jump host. Note that your new CHR will have a blank password, so be conscious of exposing it to the internet in this configuration.
Upload the VHD to your storage account using PowerShell, or the Azure Storage Explorer. This VHD will be attached to your CHR, so name it accordingly.
You can then modify the following PowerShell for VM creation:
$SubscriptionId = "12345678-1234-1234-a123-1a23b4cde56f"
$VMName = "vm-chr-test"
$ResourceGroupName = "rg-test-env"
$StorageAccountName = "sa-pebkac-test"
$LocationName = "US West"
$VMSize = "Standard F1"
$InterfaceName = "nic-chr-test"
$SourceImageUri = "https://$StorageAccountName.blob.core.windows.net/vhds/vm-chr-disk1.vhd"
$StorageAccount = Get-AzureRmStorageAccount -ResourceGroupName $ResourceGroupName -Name $StorageAccountName
$Interface = Get-AzureRmNetworkInterface -Name $InterfaceName -ResourceGroupName $ResourceGroupName
$VM = New-AzureRmVMConfig -VMName $VMName -VMSize $VMSize
$VM = Add-AzureRmVMNetworkInterface -VM $VM -Id $Interface.Id
$VM = Set-AzureRmVMOSDisk -VM $VM -Name $VMName -VhdUri $SourceImageUri -Caching "ReadWrite" -CreateOption "Attach" -Linux
New-AzureRmVM -ResourceGroupName $ResourceGroupName -Location $LocationName -VM $VM -Verbose
After this, your VM will take a few minutes to create, and you’ll be able to login and continue configuration.
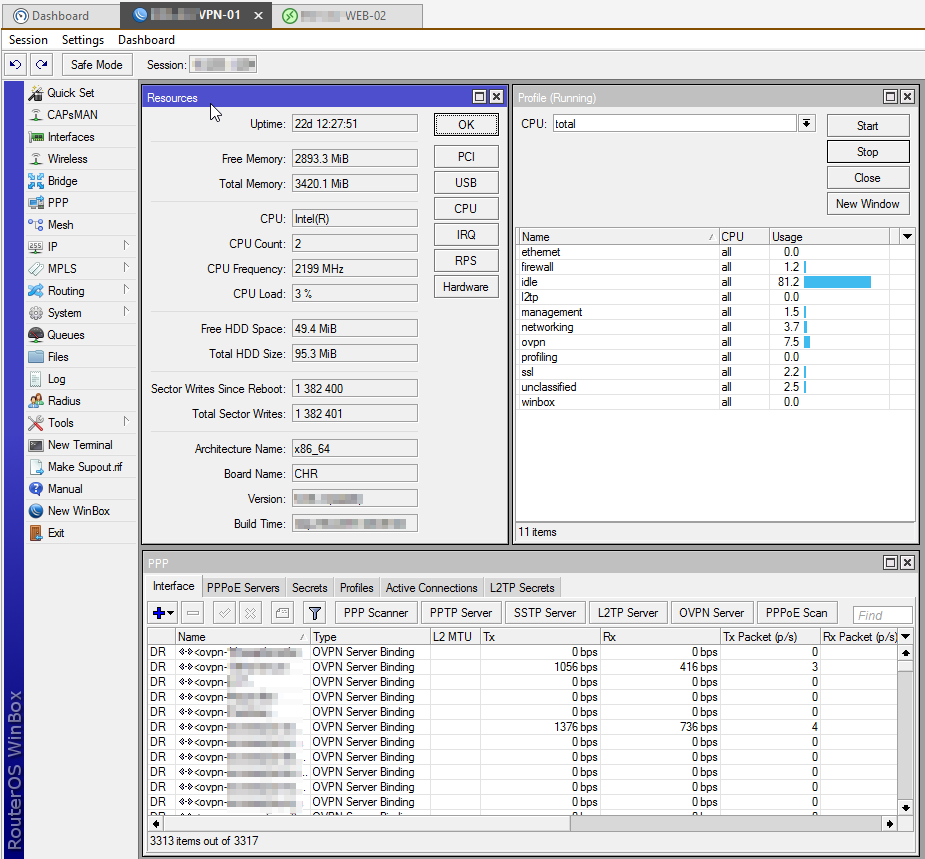
Here’s one of our busy VPN routers cruising along: